How Labels Are Made: From Artwork to Finished Roll
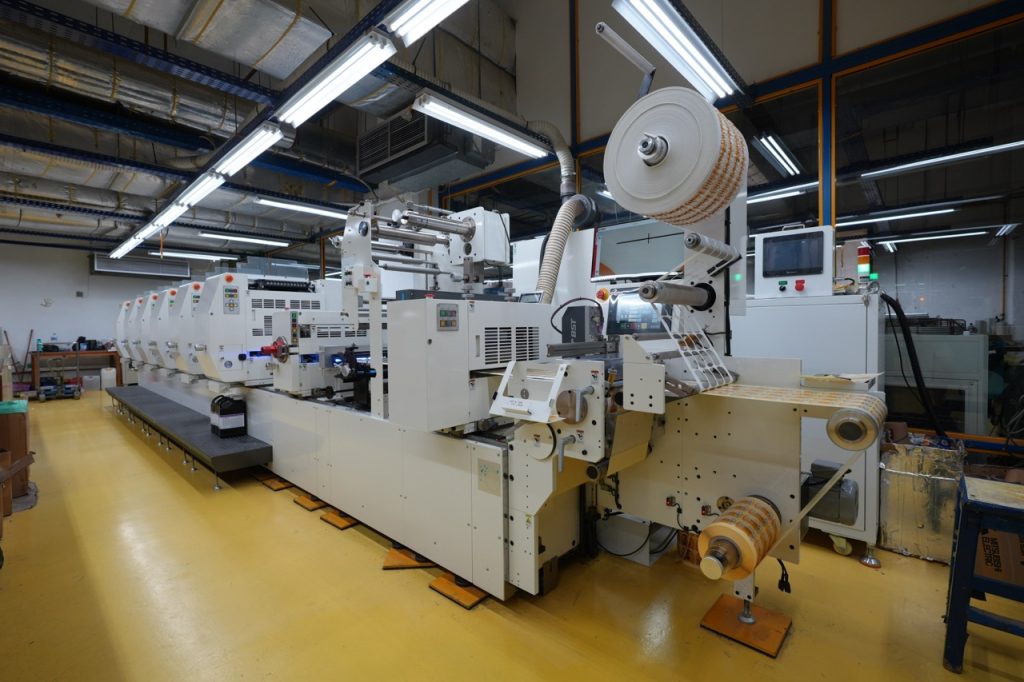
ETALEX has manufactured printed labels in Cairo since 1952. This guide walks through the label production process stage by stage: what generally happens at each one, and what a buyer can do to help a job run smoothly.
What is a self-adhesive label made of?
A self-adhesive label starts as a laminate of three layers: a facestock that carries the print, a pressure-sensitive adhesive, and a release liner that protects the adhesive until the label is applied. An Avery Dennison white paper notes that the liner “can constitute up to 35% of the unprinted label laminate”.
Almost every later stage works on that laminate as a continuous web. Facestock can be paper or film, and the choice affects printing, finishing and performance in use. Our guide to self-adhesive label materials explains the options.
The same paper illustrates how little laminate ends up on the pack: in its example the final label is 37%, against liner waste of 35%, matrix waste of 16%, and start-up waste plus labels printed in error of 10%.
What happens in artwork and pre-press?
Pre-press turns a customer’s design into files a press can print. Files are checked for errors, colours are defined and separated into printing inks, small overlaps called traps are added, and the label is repeated across the printing width. The result is approved as a proof before anything is made for the press.
Esko, a pre-press software maker, describes the main tasks:
- File checks (preflight). Are fonts, images and colour definitions correct? Esko notes that “catching errors at intake is always cheaper than catching them later in the process.”
- Colour separation. Converting artwork colours into the individual inks that will be printed, often CMYK plus spot colours.
- Trapping. Esko defines it as “creating small overlaps between adjacent color areas to prevent white gaps from appearing when colors are slightly out of register on press.”
- Step and repeat. Arranging multiple copies of the label across the plate or printing width, with the gaps that later guide cutting and slitting.
ETALEX’s certified scope, published on our certifications page, covers the “design, pre-press, manufacture, printing, conversion, finishing, and supply of self-adhesive labels”.
Why is proofing important?
A proof shows how the finished label should look before plates are made or the press runs. It is the buyer’s chance to confirm text, colours, barcodes, layout and size. Errors found at proof cost little to fix; errors found after printing can mean a full reprint.
Esko notes that “before plates are produced, a proof is generated to simulate the expected press result”, and that approval in packaging often involves several people who must sign off. Have mandatory text, codes and translations checked by whoever owns them in your business. Our label quote checklist lists what to confirm.
How is a press set up: plates, cylinders or digital?
Conventional processes print from an image carrier made for each job; digital presses print directly from the file. Flexography uses flexible relief plates mounted on cylinders, offset uses plates and a blanket, letterpress uses relief plates, and silk screen uses a mesh screen. Digital printing needs no plates, so set-up is shorter.
For flexo, Esko explains that once the file is approved it is used to expose a photopolymer plate with a laser imaging device. FINAT, the European self-adhesive label association, contrasts this with digital: there is “no need for printing plate creation, the time spent on mechanical set-up is minimal”. On a flexo press, it adds, each job changeover “will take time for mechanical set-up and print testing”.
This is why run length matters. Esko says digital “is particularly well suited to shorter runs and applications involving frequent changes or multiple versions”. Our guide to label printing methods compares the processes in detail.
How does the printing stage work?
The laminate is unwound and passes through the printing stations, usually one for each ink, with each colour landing in register with the last. Inks are dried or cured between stations. On a narrow-web label press, printing, finishing and cutting can follow one another in a single pass.
In flexography, an engraved anilox roller meters ink onto the plate. The Flexographic Technical Association (FTA) explains that the doctor blade must “entirely remove all surface ink from the anilox roller, so that the only ink transferred to the plate comes from the cells of the anilox”. Our article on what flexographic printing is covers the process more fully.
ETALEX prints in-house with letterpress (flat and rotary), rotary offset, flexography, silk screen and digital printing, with hot stamping and embossing. See our printing technologies page for how we use them.
What finishing can be added after printing?
Finishing protects the print or adds visual and tactile effects. Common options are varnish, lamination with a clear film, hot or cold foil, embossing and screen-printed effects. They are applied in line on the press or on a separate finishing machine after printing, depending on the job and equipment.
Mark Andy, a press manufacturer, lists label embellishments as including “PMS spot colors, varnishes, laminates, top coating, rotary screen, embossing, semi rotary die cutting, adhesives for cold or hot foil”.
Hot stamping uses heat and pressure to transfer foil from a carrier onto the label through a die; embossing presses a raised shape into the material. Our guides to hot stamping and cold foil and our embossed labels page explain these effects.
How are labels die-cut and stripped?
Die-cutting cuts the label shape through the facestock and adhesive but not the liner, a “kiss cut”. The unwanted material around the labels, the waste matrix, is then peeled away and wound up as waste, leaving individual labels on the liner ready to dispense.
FINAT describes the requirement: “The die blade has to cut through the laminate and stop at the face of the liner so has to achieve a perfect half cut or kiss cut.” Clean matrix stripping is what allows labels to be “dispensed on automatic label dispensers in high speed packaging lines”. FINAT adds that matrix breaks, or labels lifting with the waste, can slow the machine.
How are labels slit, rewound, inspected and packed?
The printed web is slit into individual lanes and rewound onto cores as finished rolls, with the labels facing and running in the direction the customer’s applicator needs. Rolls are inspected, either across the whole web by camera or by sampling, then labelled, counted and packed for delivery.
Winding matters for the customer’s line. HERMA, a German label maker, explains that the winding direction decides whether labels face in or out on the roll and which end leaves the liner first, and warns that “an incorrect winding direction can lead to dispensing errors and production waste.” It describes a 76.2 mm (3-inch) core as the industry standard for automatic labelling machines.
Inspection checks that what was printed matches what was approved. Esko describes 100% inspection as meaning “100% of the printed web is inspected 100% of the time.” Mark Andy says its inspection rewinders detect “missing labels, remaining matrix, splices, flags, spots, fading and missing color, and defects in text and registrations”.
| Stage | What generally happens | What the buyer can do |
|---|---|---|
| Artwork and pre-press | File checks, colour separation, trapping, step and repeat | Send final, complete artwork; name spot colours |
| Proofing | A proof simulates the printed result for approval | Check text, codes, colours and size; get internal sign-off |
| Plates or digital set-up | Plates or screens made; or digital file loaded | Share run length and versions so the process can be chosen |
| Printing | Inks applied colour by colour in register, then dried or cured | Agree a colour reference |
| Finishing | Varnish, laminate, foil, embossing or screen effects | Say how the label will be handled and stored |
| Die-cutting and matrix stripping | Kiss cut to shape; waste matrix removed | Confirm shape, size and gap between labels |
| Slitting and rewinding | Web slit into lanes; rolls wound onto cores | Give core size, maximum roll diameter and winding direction |
| Inspection and packing | Rolls checked, counted and packed | Ask how faults are found and removed |
Sources: Esko; FINAT; Mark Andy; HERMA (see Sources).
Frequently asked questions
How long does it take to make labels? It depends on the process, versions, finishing and how quickly the proof is approved. Digital jobs avoid plate making; conventional jobs need plates or screens first. Ask for a schedule once artwork is final.
What is the difference between label printing and label converting? Printing applies the image to the label material. Converting covers what turns the printed web into usable labels: die-cutting, matrix stripping, slitting and rewinding. Many label makers do both in one line or on separate machines.
Why do label rolls need a specific winding direction? Labelling machines dispense labels in one orientation. If labels face the wrong way or come off upside down, they cannot be applied correctly, causing stoppages and waste. Tell your supplier the winding direction, core size and maximum roll diameter.
Can one label combine several printing processes? Yes. A label can be printed by one process and finished with another, for example flexo or offset print with hot stamping, embossing or screen-printed effects. Our printing technologies page shows the processes ETALEX runs.
Sources
- ETALEX, About page. https://www.etalex.com/about/. Accessed 8 October 2026 (live page). Used for: established in Cairo in 1952; letterpress in flat and rotary, rotary offset, flexography, silk screen, digital printing and hot stamping; embossed labels.
- ETALEX, Awards and certifications page. https://www.etalex.com/awards/. Accessed 8 October 2026 (live page). Used for: certified scope “design, pre-press, manufacture, printing, conversion, finishing, and supply of self-adhesive labels and specialty label solutions using flexographic, offset, screen, and digital printing processes”; ABS Global certificates.
- Avery Dennison (Mariya Nedelcheva and Jenny Wassenaar), “Label liners: meeting the sustainability challenge” (white paper, PDF). https://label.averydennison.com/content/dam/averydennison/lpm-responsive/europe/english/images/products/film/sustainability-clear-intenst/white-paper-on-liner-sustainability.pdf. Accessed 8 October 2026. Used for: laminate of liner, adhesive and facestock; liner up to 35% of the unprinted laminate; illustrative breakdown (final label 37%, liner 35%, matrix 16%, start-up waste and printed in error 10%).
- Esko (Alexandra Blanck), “What Is Flexo Prepress? A Complete Guide”, 15 June 2026. https://www.esko.com/en/blog/flexo-prepress-full-guide. Accessed 8 October 2026. Used for: preflight checks; colour separation; trapping definition; step and repeat; proof before plates; approval by several stakeholders; photopolymer plate exposed by laser imaging.
- Esko (Alexandra Blanck), “Flexo vs. Other Printing Methods: How Do They Compare?”, 22 September 2026. https://www.esko.com/en/blog/flexo-vs-other-printing-methods-how-do-they-compare. Accessed 8 October 2026. Used for: flexo is plate based; digital avoids plates and suits shorter runs and multiple versions.
- Esko, “7 Reasons to Move to 100% Print Inspection”, February 2024. https://www.esko.com/en/resources/7-reasons-to-move-to-100-print-inspection. Accessed 8 October 2026. Used for: definition of 100% inspection.
- FINAT, “Understanding the hidden ROI of digital label printing”, 24 April 2025. https://www.finat.com/news/understanding-the-hidden-roi-of-digital-label-printing. Accessed 8 October 2026. Used for: no plate creation and minimal mechanical set-up in digital; flexo changeovers need set-up and print testing.
- FINAT (Harveer Sahni), “Waste matrix removal in label production”, 23 February 2018. https://www.finat.com/blogs/waste-matrix-removal-in-label-production. Accessed 8 October 2026. Used for: kiss cut definition; matrix stripping enables automatic dispensing; matrix breaks and labels lifting slow the machine.
- Flexographic Technical Association (Bill Warner), “The Best Doctor Blade for Every Flexographic Application”. https://www.flexography.org/industry-news/the-best-doctor-blade-for-every-flexographic-application/. Accessed 8 October 2026. Used for: doctor blade removes surface ink so only ink in the anilox cells reaches the plate.
- Mark Andy (Artur Gondek), “3 Ways Offline Finishing Supports Your Digital Print”, 19 March 2019. https://www.markandy.com/news/3-ways-offline-finishing-supports-your-digital-print/. Accessed 8 October 2026. Used for: list of label embellishments; offline finishing speeds changeovers.
- Mark Andy, “Offline Finishing Equipment” (Rotoflex). https://www.markandy.com/equipment/finishing/. Accessed 8 October 2026. Used for: inspection rewinders detect missing labels, remaining matrix, splices, flags, spots, fading and missing colour, and text and registration defects.
- HERMA, “Configure and order printed roll labels online”. https://www.herma.com/label/label-configurator/configure-and-order-printed-roll-labels-online/. Accessed 8 October 2026. Used for: winding direction defines label orientation on the roll and dispensing; incorrect winding causes dispensing errors and waste; 76.2 mm core standard for automatic labelling machines.
Written by
Etalex Team
Content & Editorial Team
Practical guidance on label printing, finishing, materials and packaging, informed by Etalex's manufacturing experience in Cairo since 1952.
Related guides
Materials & Technology
What Is a Pressure-Sensitive Label? Construction and Adhesive Types
Key answer A pressure-sensitive label is a label whose adhesive is already tacky and sticks to a surface with light hand or machine pressure, with…
Materials & Technology
What Is Flexographic Printing? Process, Strengths and Limits
Key answer Flexographic printing (flexo) is a relief printing process. A flexible plate with a raised image is inked by an engraved anilox roller, which…
Industry Insights
Industrial Labels: Durability Requirements and Material Options
Key answer An industrial label has to stay attached and readable for as long as the product is in use, often years, through abrasion, oils,…
Talk to the Etalex team
Ready to discuss your labels?
Send the size, quantity, material, finish and container, with artwork if you have it. Our team in Cairo replies during working hours, Sunday to Thursday.